 |
| Find at art and fabric stores in rolls or sheets. |

This method will make letters and numbers that appear, from a distance, to be one piece of glass although actually composed of sections. Very useful for readability of house numbers and signs.
[Click images to enlarge.]
Previously I used a paper pattern to trace around. I have since found Saral Transfer paper, especially the yellow color, works quite well on glass. My red works ok as well, but not the blue and white. Don't know why. Maybe just my package??

1. Make a template. First I type my words or numbers in a word processing program, select a font and size then print. For this method you will want an actual size printout.
2. Trace your template. Clean your glass, then simply position your printout template over your selected section of glass, slip the transfer paper in underneath, and trace your image.
Not quite in the right place, need to re-do? The transfer on the glass will buff off or wipe off with a bit of glass window cleaner.


Above are the tools I use to 'cut' out my image from the glass. Left to right:
Running Pliers, Grozier Pliers, Breaking Pliers, Glass Scorer, Wheeled Nippers, Metallic Permanent Marker

A. First score around the entire transferred outline.
B. Next score rough break lines. For this image I made five rough break lines.
B. Next score rough break lines. For this image I made five rough break lines.
How did I decide where to put the rough breaks?
First task was to section off the top of the five. Then section off the upright area connecting the top to the curved bottom. Now the curved bottom needed to be sectioned so the wheeled nippers can get in there and nip away the extra glass. Too large a curve and the glass will want to break straight, not curved! I added score lines to section it into three pieces.
Use the running pliers to break the glass along the rough break lines.
Shown here is the first break. You'll note this is not a perfect system and sometimes the glass just does not break where you scored. I was lucky and it deviated outside of my image.
Do have extra glass on hand to re-do your image if the glass does not cooperate :/

Tip: As you make each break, put the pieces back down to re-make the image. It is quite easy to get lost now, especially if you inadvertently turn a piece, or turn over a piece.

Finesse time.
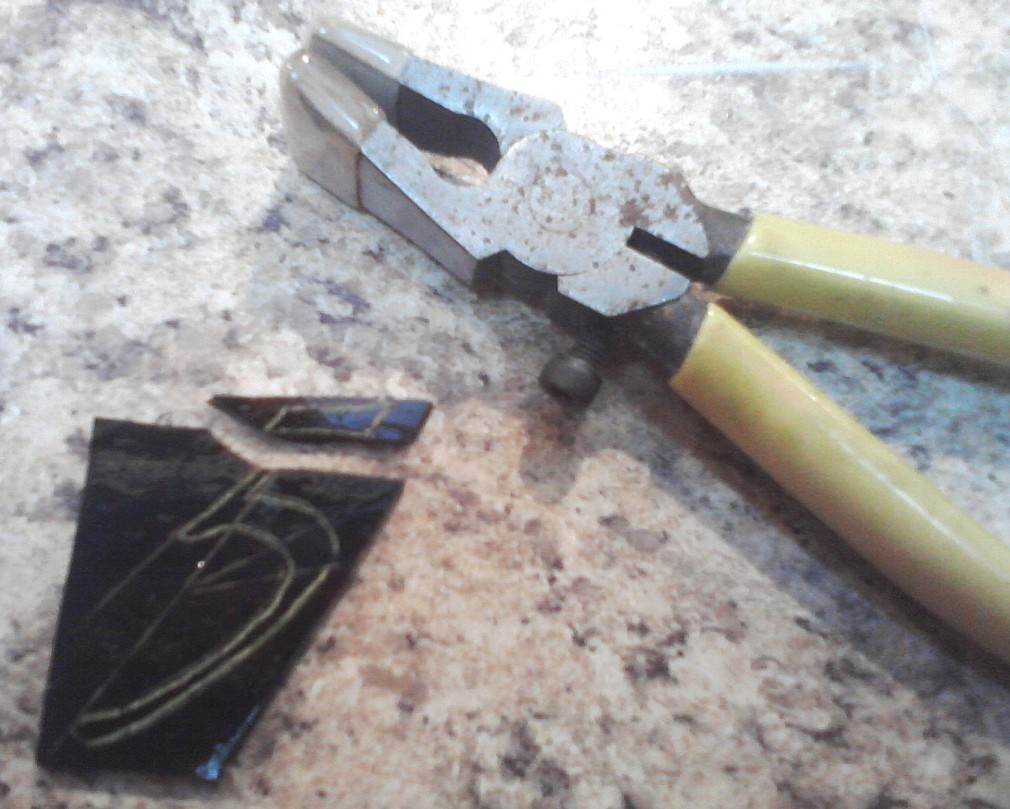
Here I will use the grozier & breaking pliers together and/or the wheeled nippers. Just depends on the shape. For short straight breaks, use the pliers combo.
For gentle curves use the wheeled nippers. Nip off a small amount at a time until you get to the score line around the image. I have a general rule of thirds- nip off no more than 1/3 of the way to your drawn line at a time.
Do be sure your nippers have fresh cutting edges. Use the little allen key that comes with it to loosen and turn the wheels if the glass takes force to nip.

And the clear tape is used to hold the pieces together until they can be glued.
Working direct, place tape on the right side of the glass. Align each piece precisely and glue down to your board altogether.
Working indirect, place tape sticky side up on your table and assemble glass on top of tape. Glue down on your board altogether by flipping over onto board so right side is down and tape is now up.

I make more than just signs!
I create original design silver jewelry too!!https://www.mosaicsmith.com/collections/all or
https://mosaicsmith.etsy.com
No comments:
Post a Comment