MosaicSmith Blog

Showing posts with label sign. Show all posts

Monday, August 6, 2012

More: How to Make Glass Numbers and Letters to Mosaic

Image of Saral Transfer Paper
Find at art and fabric stores in rolls or sheets.
Tracing the image onto glass using transfer paper.
I did another post a while back on making stained glass numbers but wanted to re-visit the subject with a couple additional tips and more photos.

This method will make letters and numbers that appear, from a distance, to be one piece of glass although actually composed of sections. Very useful for readability of house numbers and signs.


[Click images to enlarge.]

Previously I used a paper pattern to trace around. I have since found Saral Transfer paper, especially the yellow color, works quite well on glass. My red works ok as well, but not the blue and white. Don't know why. Maybe just my package??


Image transferred onto glass.

1. Make a template. First I type my words or numbers in a word processing program, select a font and size then print. For this method you will want an actual size printout.


 2. Trace your template. Clean your glass, then simply position your printout template over your selected section of glass, slip the transfer paper in underneath, and trace your image.

Not quite in the right place, need to re-do? The transfer on the glass will buff off or wipe off with a bit of glass window cleaner.
Tools to be used to shape image.
Above are the tools I use to 'cut' out my image from the glass. Left to right:
Running Pliers, Grozier Pliers, Breaking Pliers, Glass Scorer, Wheeled Nippers, Metallic Permanent Marker


Rough break lines scorred in glass.
3. Score the glass.

A.  First score around the entire transferred outline.
B. Next score rough break lines. For this image I made five rough break lines.

How did I decide where to put the rough breaks?
First task was to section off the top of the five. Then section off the upright area connecting the top to the curved bottom. Now the curved bottom needed to be sectioned so the wheeled nippers can get in there and nip away the extra glass. Too large a curve and the glass will want to break straight, not curved! I added score lines to section it into three pieces.
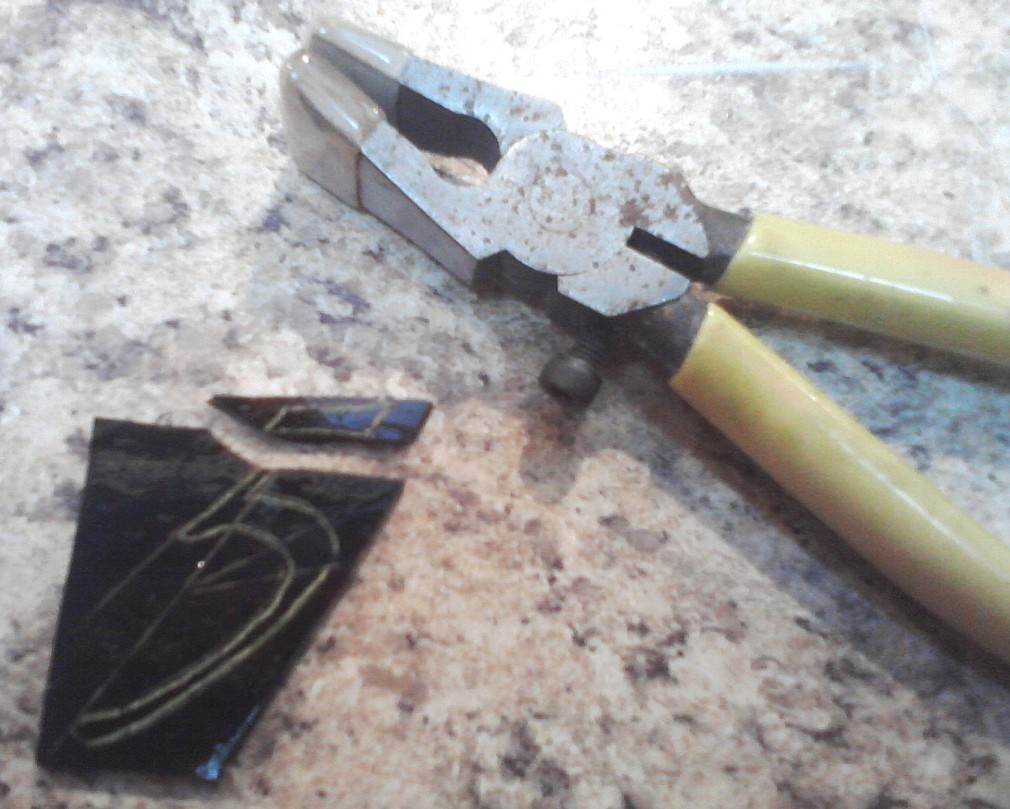
First rough break make using running pliers.
 4. Break glass on rough break lines.

Use the running pliers to break the glass along the rough break lines.

Shown here is the first break. You'll note this is not a perfect system and sometimes the glass just does not break where you scored.  I was lucky and it deviated outside of my image.

Do have extra glass on hand to re-do your image if the glass does not cooperate :/
All rough breaks now made to image.
< Here all five rough break lines are broken using the running pliers.

Tip: As you make each break, put the pieces back down to re-make the image.  It is quite easy to get lost now, especially if you inadvertently turn a piece, or turn over a piece.
Image now completely shaped after use of grozier/breaking piers and wheeled nippers.
5. Finish shaping the image pieces.

Finesse time.
Here I will use the grozier & breaking pliers together and/or the wheeled nippers.  Just depends on the shape. For short straight breaks, use the pliers combo.

For gentle curves use the wheeled nippers. Nip off a small amount at a time until you get to the score line around the image. I have a general rule of thirds- nip off no more than 1/3 of the way to your drawn line at a time.

Do be sure your nippers have fresh cutting edges. Use the little allen key that comes with it to loosen and turn the wheels if the glass takes force to nip.

Cleanup and assembly of glass.
 6. Cleanup and assembly.  I use a bit of ammonia based glass cleaner on a paper towel to clean off the transfer paper line as well as any oil from the scorer or my hands.

And the clear tape is used to hold the pieces together until they can be glued.

Working direct, place tape on the right side of the glass. Align each piece precisely and glue down to your board altogether.

Working indirect, place tape sticky side up on your table and assemble glass on top of tape. Glue down on your board altogether by flipping over onto board so right side is down and tape is now up.
Completed image created in glass.
Got a sign to make? Give this method a try.  You can see some projects I have used this method with.  Click stepping stone here or in my word cloud at right -do be sure to scroll down as a few posts will pop up, including a few where other methods were used.

I make more than just signs! 

I create original design silver jewelry too!! 
https://www.mosaicsmith.com/collections/all   or
https://mosaicsmith.etsy.com

Friday, July 17, 2009

Sailing Welcome

Last weekend we took a short trip to St Augustine, Florida. (Just a three hour drive from here but well worth the visit even if you are farther.) So, of course, we had to hunt down a local glass shop- D&L Art Glass. Bought some nice pieces of glass and a whole box of scraps. If you are a mosaic artist you know what I mean when I say I was almost giddy that they sort their scraps by color and had a generous variety.

Back home, I put all my goodies away but didn't have an immediate home for these pretty bits:

Before I knew it they were speaking to me and I had this little sign made:


SOLD, but visit my etsy shop to see what is available.        

Sunday, January 4, 2009

My Method for How to Make Numbers to Mosaic


My approach to making numbers for mosaicing is a bit different than the norm and my quilting background shows up here. I think it is a bit like paper piecing in reverse.


I like to piece numbers like this since I think with the minimal grout lines they are more clearly visable to do their job in the finished piece.

Click on any picture to see a large version.
First I use a metallic marker to trace the right side of the number on the right side of the glass.
Then begin systematically making cuts and breaking out pieces.
For the #1, I started by scoring and breaking the base from the number then did the same with the angled top portion. Use either the wheeled cutter or score/break to finish the shape.
For the #8, first step was to score the drawn line completely with the glass cutter and continue the score line through the center forming an 'x'. I extended some score lines to the edge of the glass and added some more lines radiating from the center to break up the sharp curves.
All the tools I used are shown- glass cutter, running pliers, breaking pliers, grozier pliers and wheeled cutters.


I make more than just signs! 

I create original design silver jewelry too!! 
https://www.mosaicsmith.com/collections/all   or
https://mosaicsmith.etsy.com

Friday, December 26, 2008

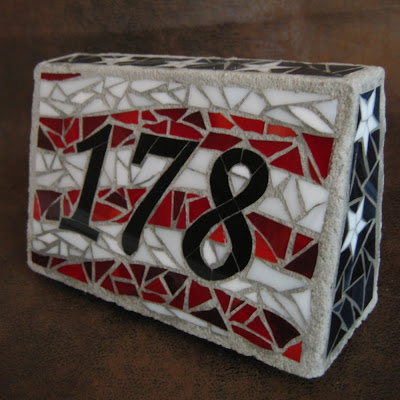
Poured Concrete House Number Mosaics

Who knew: playing with concrete is like a grown up version of playing with mud pies. Just more durable and prettier too.

First I custom designed and built the mold. It is sized so the finished house number 'brick' will fit in a flat rate mailing box. I used double ended screws and wing nuts for easy assembly/disassembly. Varnished well with spar varnish.

Then the design was pieced, in reverse, on contact paper and placed in the mold. For this one I continued the design around the edge.


A few additional designs:


-----

Usually my work is one-of-a-kind but for these I created reproducible patterns that can be used for 1-4 numbers.
~~~~~~~
Edit: November 2013 - I am not currently creating house numbers, nor doing custom work.  Too many other ideas in my head!!

Please visit my Etsy MosaicSmith shop to see what I have been creating:

Http://MosaicSmith.etsy.com 


Currently you will find a wide array of original design silver jewelry as well as mosaic art and mosaic clock. Life's a journey and I am excited to learn new skills along the way :)

Monday, October 27, 2008

How to Hang a Mosaic Made on Concrete Board

I was reminded today that some details on how to mosaic are quite elusive in books.

What follows is the method I use for hanging my smaller mosaics that I've created on concrete board (Hardibacker). The largest size I've used this on is about 12" x 12". (See comments for some ideas on hanging larger work.)

The hardware must be installed BEFORE beginning your mosaic. I usually obtain the hardware from the specialty drawers at the big-box home improvement stores. I have read lots of mosaic books but only saw this method mentioned online (Sorry, that site no longer exists to link to.).

This is what you need to purchase:

#6-32 size Tee Nuts in 1/4"
#6-32 size 3/8" brass screws
#6 or #8 stainless steel washers
Stainless Steel picture wire


And this is what the Tee Nuts look like. You can get pronged or un-pronged. I get pronged since then they will grip your concrete board and not slip.

Other tools:
Drill with a bit sized for the Tee-nut
Hammer


Drill a hole in the board and, FROM THE FRONT, hammer in the Tee nut.

Picture on the far left is the front of the mosaic surface and the right picture shows the resulting threaded hole on the back. I use thin-set mortar for glue and that helps even out the raised surface of the Tee-nut.


From the back, add the screw and washer. Repeat for the second hanging spot and you are ready to wrap your picture wire around the screws. The washers help keep the picture wire in place and not slip off the screws.

The finished back using this hanging method


I create original design silver jewelry too!! 
https://www.mosaicsmith.com/collections/all   or
https://mosaicsmith.etsy.com

Wednesday, September 24, 2008

Mosaic Welcome Sign

A little bit of the process of making a mosaic:

This time I just started with an idea in my head- no picture or sketch- just "Hmm, I haven't made a welcome sign in a while." So I pulled out a piece of concrete board (already prepped with Tee Nuts for hanging) and pulled down some bits to play. I have PLENTY of bits, lol. I save even little teeny bits. See that colorful section in the first picture? I also have a LOT of plastic containers with color sorted pieces leftover from other projects. That's where the glass for the letters came from. See the second photo. Lots of nice long skinny pieces there already. Perfect for lettering.

I penciled in letters based on the size of the glass and sketched on the board until it looked right. Yellow came in from pieces I cut but didn't use for my Interloper Clock . Then I guess I had my previous welcome sign in my head because I pulled out leftover bits saved from that project. Add in a few more colors of glass for shading to white plus little black freshwater pearl beads and I was on my way.


mosaic welcome sign


Last picture shows finished mosaic grouted in warm grey. I also painted the edge and back with a deep green exterior paint. I like to work on concrete board since it is so weather friendly compared to wood.

*This sign has sold. 


I also make original design silver jewelry:
http://MosaicSmith.com